【Androidアプリ開発】画面レイアウト作成
前回、プロジェクトを作成しました。
以下の記事です。

Androidの開発はオブジェクト指向です。オブジェクトに対してプログラミングを行うのでまずオブジェクトを作成する必要があります。
ということで今回はAndoridのレイアウト作成について説明しようと思います。
Android開発のレイアウトについて
Android開発でのレイアウトに関しては、XMLで行います。
まず「activity_main.xml」を開いてみましょう。

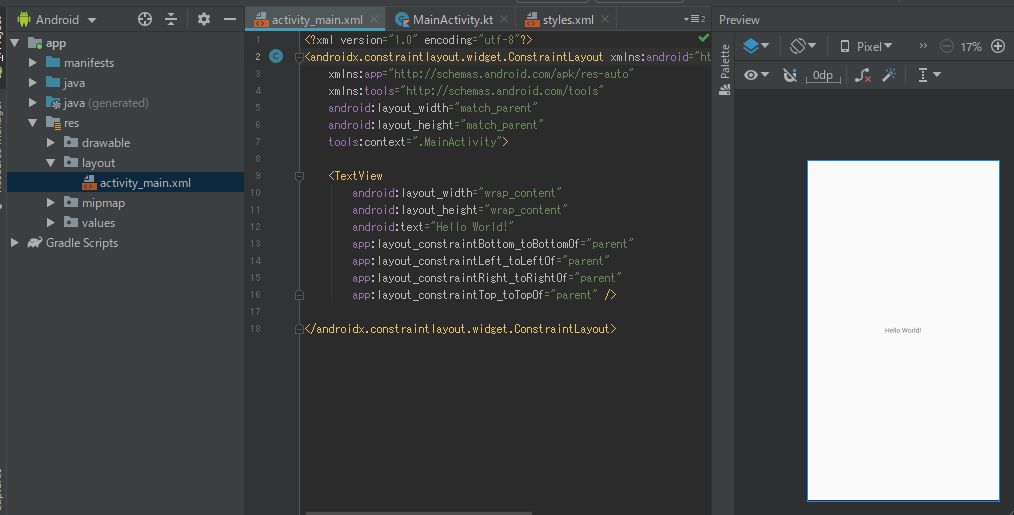
以下がXMLの部分の全体です。
<?xml version="1.0" encoding="utf-8"?>
<androidx.constraintlayout.widget.ConstraintLayout
    xmlns:android="http://schemas.android.com/apk/res/android"
    xmlns:app="http://schemas.android.com/apk/res-auto"
    xmlns:tools="http://schemas.android.com/tools"
    android:layout_width="match_parent"
    android:layout_height="match_parent"
    tools:context=".MainActivity">

    <TextView
        android:layout_width="wrap_content"
        android:layout_height="wrap_content"
        android:text="Hello World!"
        app:layout_constraintBottom_toBottomOf="parent"
        app:layout_constraintLeft_toLeftOf="parent"
        app:layout_constraintRight_toRightOf="parent"
        app:layout_constraintTop_toTopOf="parent" />

</androidx.constraintlayout.widget.ConstraintLayout>
順に確認していきたいと思います。
1行目:これは、XMLのバージョンと文字コードを宣言しています。
ConstraintLayoutについて
2行目~:「ConstraintLayout」が基本レイアウトになっています。
「ConstraintLayout」は画面部品を相対的(親部品に対して)に配置します。
他によく使われるのは、「LinearLayout」ですね。部品を縦または横に並べて配置するので扱いやすいです。今回は「ConstraintLayout」を使えるようになりたいのでこのまま行こうと思います。
xmlsについて
xlmsは、名前空間を指しています。例えば6行目の以下の部分
android:layout_width="match_parent"の部分ですが、本当であれば
{http://schemas.android.com/apk/res/android}layout_width="match_parent"と書く必要があるところを
xmlns:android="http://schemas.android.com/apk/res/android"とすることで「android:」に省略できるということです。
tools:context
レイアウトがデフォルトで関連付けられるアクティビティを宣言します。
これを行うとonClickハンドラを宣言するときにエディタまたはレイアウト プレビューの機能が有効になります。
onClickとはその部品がクリックされたときの処理を指します。
layout_width/layout_height
「layout_width/layout_height」はその名の通りレイアウトの幅と高さです。
| match_parent | 親部品のサイズにマッチします。 |
| wrap_content | 部品を表示するのにちょうどいいサイズに自動調整します。 |
app:layout_constraint~
app:layout_constraintBottom_toBottomOf="parent"
app:layout_constraintLeft_toLeftOf="parent"
app:layout_constraintRight_toRightOf="parent"
app:layout_constraintTop_toTopOf="parent"
この部分ですね、イメージとしては部品を引っ張っているというイメージです。
例えば
app:layout_constraintLeft_toLeftOf="parent"
app:layout_constraintTop_toTopOf="parent"
だけにすると左上に引っ張られます。

レイアウトを作成する
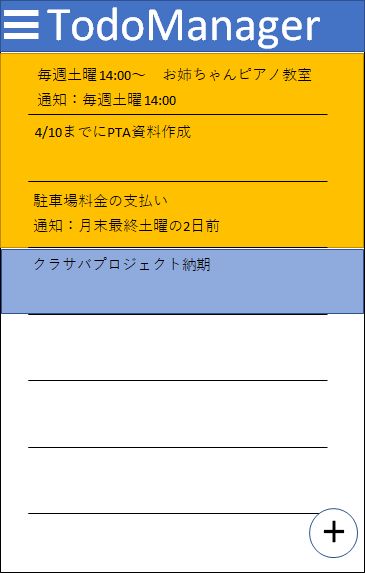
説明はこの辺にして、レイアウトを作成してみようと思います。今回のTodoManagerの画面イメージはこんな感じで考えています。これが今回の最終目標です。

とにかく早速作ってみます。
まずはリストを作っていきましょう。
<?xml version="1.0" encoding="utf-8"?>
<androidx.constraintlayout.widget.ConstraintLayout
    xmlns:android="http://schemas.android.com/apk/res/android"
    xmlns:app="http://schemas.android.com/apk/res-auto"
    xmlns:tools="http://schemas.android.com/tools"
    android:layout_width="match_parent"
    android:layout_height="match_parent"
    tools:context=".MainActivity">

    <ListView
        android:id="@+id/lvTodoList"
        android:layout_width="match_parent"
        android:layout_height="match_parent" />

</androidx.constraintlayout.widget.ConstraintLayout>
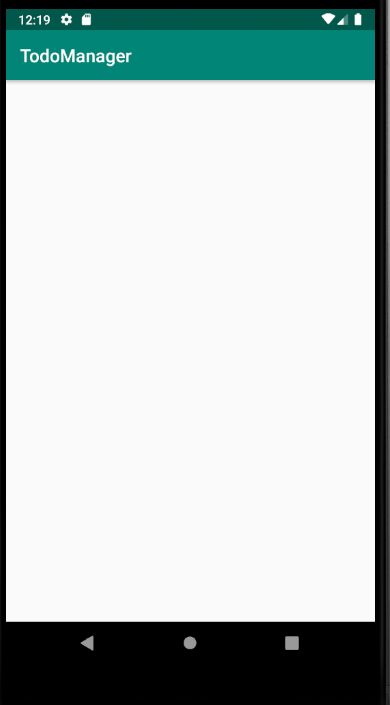
こんな風にしました。これで実行します。

タイトルだけ見えていますが、見えていないだけで白い部分はリストです。
デバッグの仕方は以下の記事で説明しています。

次の記事でリスト表示の部分からやってみようと思います。
まとめ
すでにあるものを修正するのは意外と簡単ですが、何もないところから一から作り上げるというのはなかなか骨が折れます。
とにかくまず小さく作って動作させる、それを積み重ねてだんだん機能を充実させていく方がいいと思います。
ここまで読んで頂いてありがとうございます。
