【Androidアプリ開発】画面レイアウトを編集する
前回は新しいアクティビティを作成し遷移することやりました。
今回はTodoを登録する画面のレイアウトを編集してみようと思います。
ConstraintLayoutを使っているのでそのやり方も説明していこうと思います。
ConstraintLayoutのレイアウトを編集する
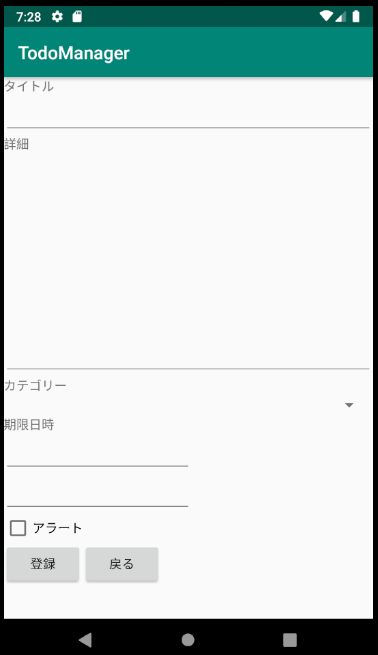
まずは今回完成した画面レイアウトです。
まずは文字列です。
<resources>
    ・・・

    <string name="update_todo_title">タイトル</string>
    <string name="update_todo_description">詳細</string>
    <string name="update_todo_category">カテゴリー</string>
    <string name="update_todo_limit">期限日時</string>
    <string name="update_todo_alert">アラート</string>
    <string name="update_todo_register">登録</string>
    <string name="update_todo_cancel">戻る</string>
</resources>
次にレイアウトです。
<?xml version="1.0" encoding="utf-8"?>
<androidx.constraintlayout.widget.ConstraintLayout
    xmlns:android="http://schemas.android.com/apk/res/android"
    xmlns:app="http://schemas.android.com/apk/res-auto"
    xmlns:tools="http://schemas.android.com/tools"
    android:layout_width="match_parent"
    android:layout_height="match_parent"
    tools:context=".TodoUpdateActivity">

    <TextView
        android:id="@+id/tvTitle"
        android:layout_width="wrap_content"
        android:layout_height="wrap_content"
        android:text="@string/update_todo_title"
        app:layout_constraintStart_toStartOf="parent"
        app:layout_constraintTop_toTopOf="parent" />

    <EditText
        android:id="@+id/etTitle"
        android:layout_width="fill_parent"
        android:layout_height="wrap_content"
        android:ems="10"
        android:inputType="text"
        app:layout_constraintStart_toStartOf="parent"
        app:layout_constraintTop_toBottomOf="@+id/tvTitle" />

    <TextView
        android:id="@+id/tvDescription"
        android:layout_width="wrap_content"
        android:layout_height="wrap_content"
        android:text="@string/update_todo_description"
        app:layout_constraintStart_toStartOf="parent"
        app:layout_constraintTop_toBottomOf="@+id/etTitle" />

    <EditText
        android:id="@+id/etDescription"
        android:layout_width="fill_parent"
        android:layout_height="250dp"
        android:ems="10"
        android:gravity="start|top"
        android:inputType="textMultiLine"
        app:layout_constraintEnd_toEndOf="parent"
        app:layout_constraintStart_toStartOf="parent"
        app:layout_constraintTop_toBottomOf="@+id/tvDescription" />

    <TextView
        android:id="@+id/tvCategory"
        android:layout_width="wrap_content"
        android:layout_height="wrap_content"
        android:text="@string/update_todo_category"
        app:layout_constraintStart_toStartOf="parent"
        app:layout_constraintTop_toBottomOf="@+id/etDescription" />

    <Spinner
        android:id="@+id/spCategory"
        android:layout_width="409dp"
        android:layout_height="wrap_content"
        app:layout_constraintStart_toStartOf="parent"
        app:layout_constraintTop_toBottomOf="@+id/tvCategory" />

    <TextView
        android:id="@+id/tvLimit"
        android:layout_width="wrap_content"
        android:layout_height="wrap_content"
        android:text="@string/update_todo_limit"
        app:layout_constraintStart_toStartOf="parent"
        app:layout_constraintTop_toBottomOf="@+id/spCategory" />

    <EditText
        android:id="@+id/etLimitDate"
        android:layout_width="wrap_content"
        android:layout_height="wrap_content"
        android:ems="10"
        android:inputType="date"
        app:layout_constraintStart_toStartOf="parent"
        app:layout_constraintTop_toBottomOf="@+id/tvLimit" />

    <EditText
        android:id="@+id/etLimitTime"
        android:layout_width="wrap_content"
        android:layout_height="wrap_content"
        android:ems="10"
        android:inputType="time"
        app:layout_constraintStart_toStartOf="parent"
        app:layout_constraintTop_toBottomOf="@+id/etLimitDate"
        />

    <CheckBox
        android:id="@+id/checkBox"
        android:layout_width="wrap_content"
        android:layout_height="wrap_content"
        android:text="@string/update_todo_alert"
        app:layout_constraintStart_toStartOf="parent"
        app:layout_constraintTop_toBottomOf="@+id/etLimitTime" />

    <Button
        android:id="@+id/btnAdd"
        android:layout_width="wrap_content"
        android:layout_height="wrap_content"
        android:onClick="onBackButtonClick"
        android:text="@string/update_todo_register"
        app:layout_constraintStart_toStartOf="parent"
        app:layout_constraintTop_toBottomOf="@+id/checkBox" />

    <Button
        android:layout_width="wrap_content"
        android:layout_height="wrap_content"
        android:onClick="onBackButtonClick"
        android:text="@string/update_todo_cancel"
        app:layout_constraintStart_toEndOf="@id/btnAdd"
        app:layout_constraintTop_toTopOf="@id/btnAdd" />


</androidx.constraintlayout.widget.ConstraintLayout>
これを表示するとこうなります。
それでは説明していきます。
デザインモードでレイアウトする
Textモードで一つずつ入力してもいいですが、今回はデザインモードを併用しようと思います。
デザインモードにします。

TextViewを置く
まずTextViewも画面にドラッグ&ドロップします。
次に画面の位置を親ウィンドウの枠に指定します。
この時テキストモードにして確認するとソースは以下のようになります。
    <TextView
        android:id="@+id/textView"
        android:layout_width="wrap_content"
        android:layout_height="wrap_content"
        android:text="TextView"
        app:layout_constraintStart_toStartOf="parent"
        app:layout_constraintTop_toTopOf="parent" />
これを編集して以下のようにします。
<TextView
android:id="@+id/tvTitle"
android:layout_width="wrap_content"
android:layout_height="wrap_content"
android:text="@string/update_todo_title"
app:layout_constraintStart_toStartOf="parent"
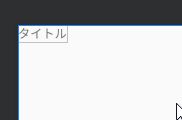
app:layout_constraintTop_toTopOf="parent" />変更したのは、「android:id」と「android:text」です。
こうなりました。
EditTextを配置する
次のEditTextをタイトルの下にセットします。
EditTextはInputTypeがたくさんありますがここはPlain Textを選択します。
ここで動画を見ていただくとわかると思いますが、ConstraintLayoutでは相対的に位置を設定します。
要はこの場合、タイトルの下にEditTextをセットするようにタイトルに紐づけています。
ソースは以下のようになります。
    <EditText
        android:id="@+id/editText2"
        android:layout_width="wrap_content"
        android:layout_height="wrap_content"
        android:ems="10"
        android:inputType="textPersonName"
        android:text="Name"
        app:layout_constraintStart_toStartOf="parent"
        app:layout_constraintTop_toBottomOf="@+id/tvTitle" />
これを変更します。
    <EditText
        android:id="@+id/etTitle"
        android:layout_width="fill_parent"
        android:layout_height="wrap_content"
        android:ems="10"
        android:inputType="text"
        app:layout_constraintStart_toStartOf="parent"
        app:layout_constraintTop_toBottomOf="@+id/tvTitle" />
変更したのは「android:layout_width」、「android:id」、「android:inputType」、「android:text」(削除)です。
タイトルは画面の横いっぱいにしました。(android:layout_width="fill_parent")inputTypeは人名ではないのでtextにしました。
あとはこれを繰り返していくだけです。
そして最終的に最初に記載したレイアウトになります。
まとめ
これでレイアウトが完成しました。実行して確認してみてください。
このままでは使いにくい部分もあるかと思いますが、気に入らなかったら修正すればいい話なのでこのまま先に進んでいこうと思います。
ここまで読んで頂きありがとうございます。